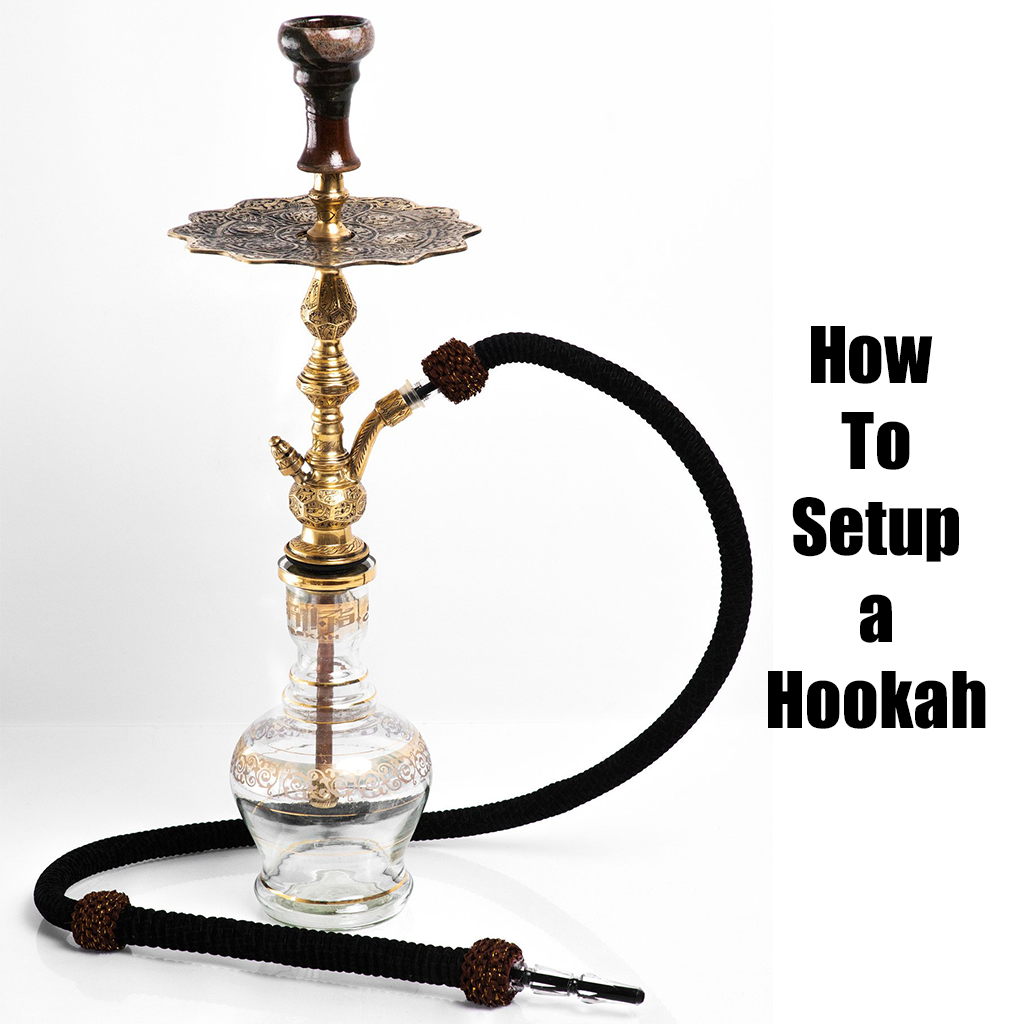
How To Set Up a Hookah
Hookahs, often referred to as shisha water pipes or a shisha pot in other regions, are traditional smoking devices that originate from the Middle East and are used to smoke flavoured tobacco. Enjoying the casual session at a shisha lounge is one thing, but what if you just purchased a new complete package and have no idea how to set up your hookah at home? At first glance, learning how to use a hookah for beginners may appear to be difficult. If you are lost and need guidance, you are in the right place to learn how to put a hookah together, pack a hookah bowl and use it accordingly.
Assembling and Using a Hookah Properly
In order to assemble, set up, and learn how to use a hookah properly, we have split this tutorial into two parts with various steps. Follow these instructions step by step to get smooth puffing in no time.
Part 1 - Set Up The Hookah Pipe
- Clean Your Hookah
- Attach Gaskets To All Hookah Components
- Pour Water Into Base
- Insert Stem Into Base
- Attach Hose
- Check for Leaks & Proper Air Flow
- Attach Tray To Upper Stem
Part 2 - Pack The Hookah Bowl Properly
- Mix Your Shisha Tobacco
- Separate Tobacco Leaves and Pack Them Into a Bowl
- Cover Bowl With Foil OR Add Heat Management Device On Top
- Puncture Holes Into Foil (Skip if using HMD)
- Attach Bowl To The Top of Stem
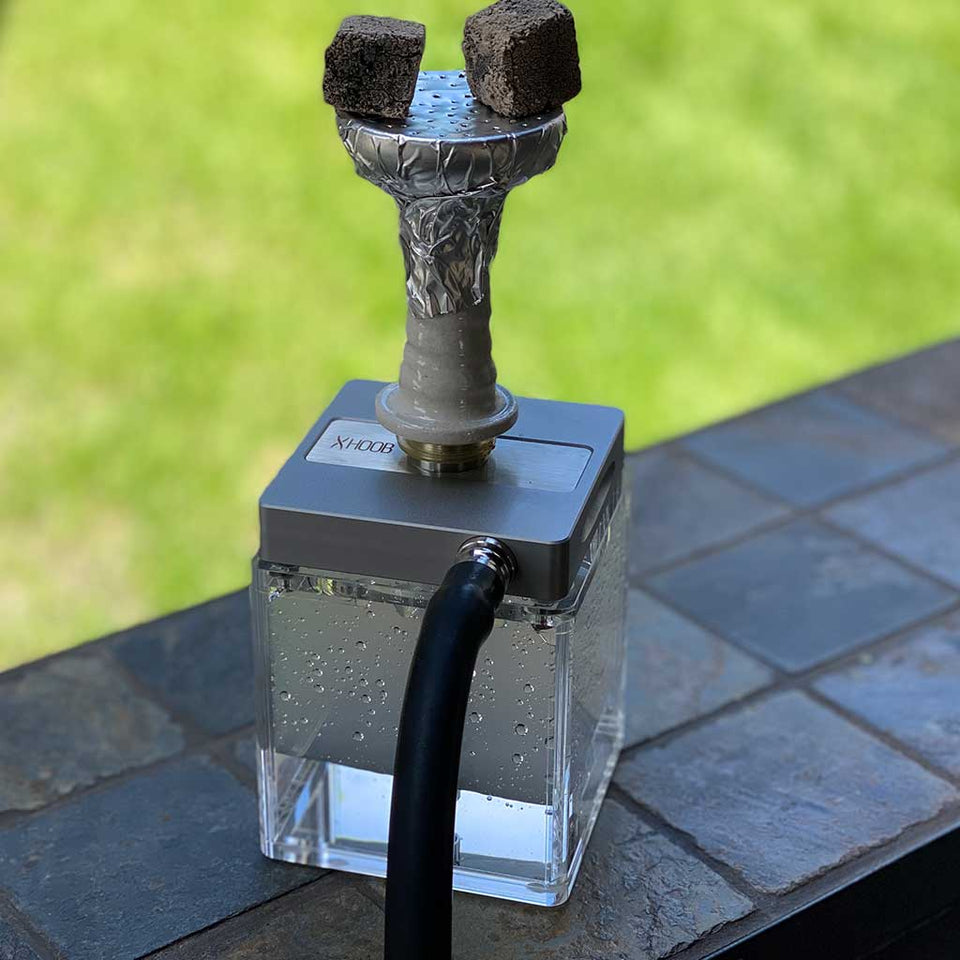
- Light Up Coals
- Transfer Coals To The Bowl
- Inhale & Smoke
Part 1 - Set Up The Hookah Pipe
In this part, we will demonstrate how to assemble all components accordingly.
Step 1 - Clean Your Hookah
Whether you just purchased a new hookah or are using an old pipe, always wash and scrub all components to ensure a pleasurable session every time. Doing so entails removing any previously smoked tobacco in your filling bowl and brushing away old residue. Next, rinse the stem, vase and hose with soap and water (if the hose is washable). Ensuring that all your hookah parts are clean will go a long way to make your smoke experience enjoyable.
Tips For Cleaning
- Clean your pipe after every session to prevent residue from forming. The longer you hold off cleaning, the harder it is to clean.
- Use hookah cleaning brushes to cleanse the inner stem and inner vase of your pipe.
- Avoid using liquids other than water in your base. Using anything other than H20 can damage your water pipe over time.
Step 2 - Attach Gaskets To All Hookah Components
Hookahs produce smoke properly when sealed correctly. If they aren't, they won't function, period. Make sure that all gaskets and grommets are attached to your elements. These include the gasket that grips the shaft / stem to your glass base/vase, the grommet that attaches to your tobacco bowl that sits on top of the stem and the gasket that grasps your hose to the shisha stem. These should fit properly and will prevent air leaks from occurring.
Tips For Gasket Use
- Check to be sure that the gaskets are in place and do not slip off or move to achieve complete air tightness
- If you've lost your gaskets, you can use hockey tape temporarily to secure your components.
- If your base wobbles, consider attaching a base protector to stabilize it.
Step 3 - Pour Water Into the Base / Vase
This step is pretty self-explanatory, or is it? Pour water into your vase, and we mean only water! Using other liquids will alter your sessions and can cause damage to your pipe. Water can be ice cold or room temperature. We recommend filling up your vase so that the water level is an inch above the end of your stem. Doing so will provide proper airflow by leaving enough space for smoke to dilute in the vase. So no more asking yourself how much water you should add to your hookah.
Tips For Water Level
- If you feel as if there is too much water in your glass vase, try inhaling straight from the hose port. If water gets into your mouth, you should pour some out of the base.
- If you feel like there is not enough water in the glass, try taking an inhale from the hose port. If you don't hear or deem any bubbling in the vase, slightly add more till you sense it's the right amount.
Step 4 - Insert Stem Into Base
In step 2, we attached all of our gaskets to each part required to do so. The middle of your stem should now have the rubber grommet attached to it before inserting it into the glass vase. Once you've checked that the rubber seal is on tightly, secure the shaft to the base.
Tips For Attaching Shaft To Base
- Ensure that the stem does not move or wobble. If it does, you may require a new gasket for the proper fitment. The seal plays a vital role in smoke production by eliminating the chances of air leaks.
- If you don't have the appropriate base seal, you can use hockey tape as a brief alternative. Wrap the tape adequately to ensure the vase and the stem are tight when connected.
- Some hookah pipes are produced in a manner so that both parts screw on together with no rubber grommet. If you own one like this, no further action is required.
Step 5 - Attach Hose
This step is pretty straightforward. Again, see to it that your rubber gaskets are attached to your hose or placed into the hose port to provide an airtight seal. Then position the hose directly into the port on the stem.
Tips For Your Hose
- Before attaching the hose, inspect it to see if it has leaks. To do so, cover one end with your finger and blow into it. If the result is you can't push any air through, it means there aren't any holes or leaks. If you hear a wisp of air or if you can blow straight through, then it may be time to replace the hose.
Step 6 - Check For Leaks & Proper Air Flow
In order to achieve smoke production from your hookah, it must be latched and shut tight. To inspect for leaks, cover the top opening of the stem with your hand to block air from entering your hookah. Then, take an inhale using your hose. If the water in the vase starts to bubble, you have successfully configured your hookah adequately. If it does not make any rumblings or sounds, go through the steps again to guarantee it is closed.
Tips For Proper Airflow
- Often the cause for air leaks is a missing bearing or valve ball. Check the purge valve element to make sure it's there.
- Check all seals to make sure they have your parts totally gripped on.
- Learn more about how to fix your hookah
Step 7 - Attach Tray To Upper Stem
The coal tray is the final segment we need to attach to our hookah before moving on to part 2 of our hookah setup. Place the tray on the upper stem. Usually, your pipe will include a tray holder close to the bowl port. If your hookah is modern-style, you may have to unscrew the bowl port and set the tray in between before concluding the assembly.
Part 2 - Pack Hookah Bowl Properly
The second part of this tutorial contains the portion of how to prepare your hookah and how to pack a hookah bowl to ignite it for thick smoke. Follow the suggested steps for you to learn how to do shisha at home.

Step 1 - Mix Your Shisha Tobacco
Shisha tobacco usually arrives packaged in plastic housings or bags. Most of the juices and glycerin mixed in with your tobacco tend to sit at the bottom of the pouch or container it's in. To get optimal results and full flavouring, stir and mix the tobacco with the juices. Give it roughly 5 minutes to breathe so that way it adjusts to room temperature. This process will help acclimate it and re-infuse the molasses and glycerin into the tobacco.
Tips For Storing Shisha Tobacco
- Keeping your tobacco stored in a dry and dark place will help keep it at room temperature.
- Avoid storing hookah flavors in a fridge or cold areas, as it could lead to thermal shock when heating up and can ruin your sessions. Thermal shock typically burns your tobacco faster than usual.
Step 2 - Separate Tobacco Leaves And Pack them Into a Bowl
To get the best performance out of your flavoring, separate the tobacco leaves from each other. When doing this, you'll notice that the glycerin and juices make the tobacco leaves stick together. With your hands, gently pull them apart separately. You want to do this step so that when you are ready to insert them into the bowl, you'll have a consistent pack. Once you've sufficiently fluffed the tobacco leaves, gently insert them into the bowl. Your end result is that it's not packed too tight or dense to allow heat to travel throughout the entire head. Now that the tobacco is inserted, press down lightly to make a flat layer leaving roughly 1 mm of space from the rim of the hookah bowl. Doing this will prevent burning or scorching.
Tips For Packing Your Bowl
- If the shisha tobacco goes above the rim, remove some leaves so that there is at least 1 mm of space between the top layer of flavoring and the edge of the head.
- Depending on the tobacco leaf type you use for smoking, you may have to dense-pack your tobacco. Dense packing is a method commonly used for dark leaves.
Step 3 - Cover Bowl With Foil OR Add Heat Management Device on Top
Now that your bowl is ready, you may add your tin foil. Ensure that when you wrap tinfoil on top of the bowl, it is shut tight around the edges so that the final result is a drum-like surface. For best results, use heavy-duty foil. It tends to be more robust than the standard type foil, makes a huge difference in managing heat and will help prevent you from scorching your session. Ensure that the HD aluminum foil is food safe to avoid the danger of inhaling toxic chemicals. For best results, use the shiny side-up method for your session.
If you are using a heat management device rather than foil, all you ought to do here is add the accessory on top of the bowl.
Tips For Using A Heating Device
- Make sure your bowl and the heating device are compatible. Typically there are bowls made precisely for using one of these apparatuses. Confirming you have the right fit will deliver the proper transfer of heat to your flavoring.
- The heating device should not touch the tobacco directly. You can pat down the shisha gently to avoid direct contact.
Step 4 - Puncture Hole Into Foil (Skip If Using HMD)
Now the fun part begins! Grab a toothpick & start poking holes in your foil. Doing this will allow your charcoal to transmit heat evenly to the shisha in order to produce smoke. You want merely enough holes poked through (not too many and not too little) so that heat retains while airflow is consistent within the bowl.
Step 5 - Attach Bowl To The Top Of the Stem
Ok, now that we are packed and poked, it's time add the bowl to the top of the stem. Position it on top of the bowl port secured with its rubber seal. You do not want this component to fall during your session, so make sure it's fastened tight. Juices tend to ooze out when your tobacco is being baked and can cause it to slip off if it's not fitted correctly, so keep that in mind when adjusting it onto the stem.
Step 6 - Light Up Coals
Everything looks good! Your pipe is finally ready. Now it is time to get it going! First things first, we need to light up hookah charcoal. Depending on the type of coal you are using, there are different methods of igniting them. Regardless of which type, you want to ensure your coals light till they burn off all chemicals, so do not rush this process! Smoking coals that are not totally lit can cause carbon monoxide poisoning.
For quick light coals, use a lighter or torch to spark them up. They should be red or amber before use. You'll want a light layer of ash to form for them to be ready for use.
For natural or coconut coals, position 2 or 3 briquettes onto a single coil burner or stove. Once you see they are half-lit, flip them with a pair of tongs to conclude the burning process. Furthermore, you want the colour of the coals to be amber to signal that they are ready for usage.
Tips For Choosing Hookah Coals
- It is recommended you use coconut charcoal for quality smoke sessions. They are the safest product to use when smoking hookah.
- Each brand varies in quality. Choose a product that's scentless, low in ash and made up of organic raw material.
Step 7 - Transfer Coals To Bowl
Now that your coals are lit and ready to go, it is time to transfer them over to your bowl. Using tongs, pick them up and place them on top of the foil. Arrange them so that they are evenly encircling the edge of the foil. Avoid placing them in the center. Doing so will char the shisha and create harshness and short-lived smoke sessions. If you are using an HMD, try placing them evenly inside. Let them heat your bowl for approximately 5 minutes. Doing so will allow an even bake and decent production.
Tips For Managing Coals During Sessions
- Throughout your sessions, be sure to flip, rotate and ash your coals.
Step 8 - Inhale And Smoke
Finally, the moment you've been waiting for this whole process! After completing the hookah setup, it is time to find a comfy spot to appreciate and smoke your hookah. When you're settled, give your smoking hose a nice drag to see if it is prepared to go. If you notice that thick smoke has not been produced, ultimately, give your bowl a few more minutes to heat up. Once you get it going, make sure you smoke at a relaxed rate and take short breaks to avoid getting headaches and other complications.